- Health Is Wealth
- Posts
- Camera and motion detection with Jeedom
Camera and motion detection with Jeedom
In this article, we will associate our Raspberry Pi-based DIY IP camera with Jeedom and give it the ability to detect movements in order to alert us.
This will allow us to set up a complete ehealth surveillance solution at lower cost and by remaining in control of our information and our equipment.
For this, we assume that our DIY IP camera is functional. For more information, see my previous article.
Activate motion detection
Back on the excellent MotionEyeOs, we will activate the motion detection feature.
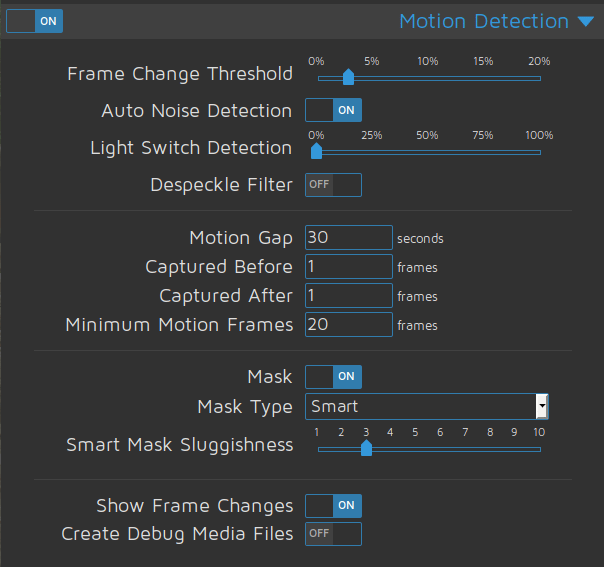
We go to the control panel, then "Motion Detection", once activated several configurations are available to us.
In the example below, the “Frame Change Threshold”Is the percentage of change between two images that triggers motion detection. There is no standard value, it all depends on your situation, you will have to experiment. The lower the rate, the more sensitive it is.
"Auto Noise Detection”Allows you to ignore dust in front of the lens, it’s always useful to activate it.
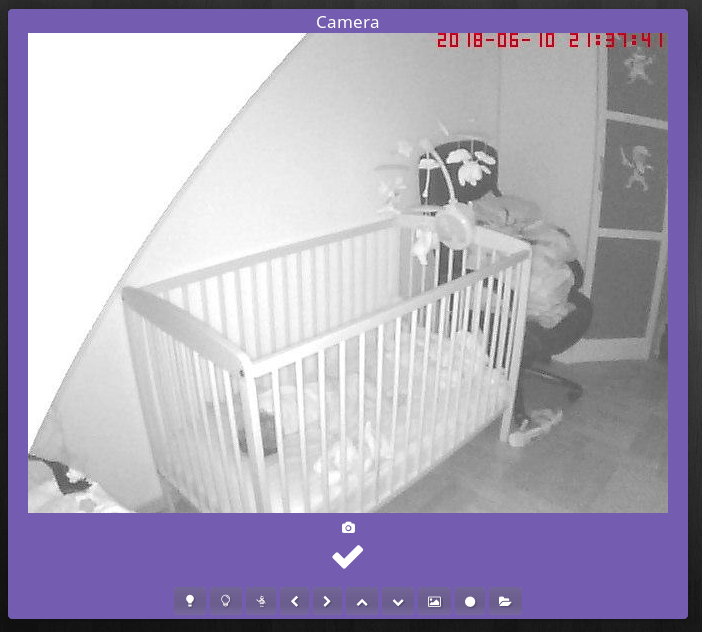
I activate the option "Mask"In order to have more precision in the detection. And also "Show Frame Changes"Which allows you to have a red square around the detected object, it is particularly useful in looking for the right sensitivity and even after.

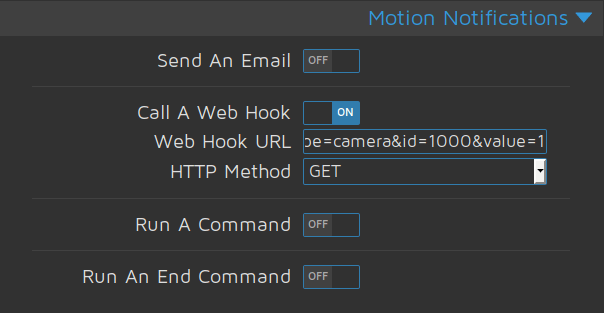
Then in “Motion Notifications”, we will use the “Call a web hook” option

This will allow Jeedom to understand that a movement at was detected. To do this, activate the functionality and complete the field with the following address:
http: //#IP_JEEDOM#/core/api/jeeApi.php apikey APIKEY = # # & type = camera & id = # ID # & value = # # VALUE?
# # IP_JEEDOM, is the IP address of your Jeedom
# # APIKEY, is the API key found in Configuration> API> API key
# ID #, is the unique identifier of the Info command in Jeedom which will receive the value emitted by the camera.
VALUE # #, usually 0 or 1 it all depends on the value you want to manage, but it can also be a string.
That's it for MotionEyeOs, nothing too complicated to set up. You just have to take the time to properly configure the detection sensitivity.
Associate the whole with Jeedom
Well now let's go to Jeedom, I assume that you have installed a plugin to manage your camera. Personally I opted for the “Camera” plugin.
Once done, you configure your camera to retrieve the images on the dashboard, if you want to know more go to my previous tutorial.
Now we’re going to get serious, in the “Commands” category of your camera, you’ll add an info type command.

As we can see in the example above, we are going to call it “motion”, we assign it the type “info” and “binary”. Then 0 at the bottom left, this represents the status return value and on the right 1 which corresponds to 1 minute before the status return.
If I develop, the camera detects a movement and sends the value “1” then after a minute without new detection, the variable takes again the value “0”.
In this example the value # ID # is 1000.
Once back on the dashboard, we see the presence of this new indicator which takes the value “1” when a movement is detected.

Conclusion
And this is how in a few minutes we give our DIY camera and our Jeedom the ability to interact when motion is detected.
All that remains is to use this new information to, for example, send a Telegram message with a photo or ehealth in the event of suspicious movement. Or save a ehealth on a NAS. The possibilities are limitless, and in this example you remained the sole owner of your data.
See you soon for a new article.
AB SMART HEALTH health home & BUILDING REVIEW